Welcome to my blog!

Welcome Friends! Please be patient while I add more info. I have SO much to share with you. Thanks for visiting!
Showing posts with label Recipes - Chicken. Show all posts

Thursday, February 29, 2024

Coconut Chicken Curry with Mango


Coconut Chicken Curry with
Vegetables & Fresh Mango as a
Garnish, Over Rice
My Own Recipe

I've eaten or prepared chicken curry dishes 100's of times in my life, but tonight is the first I've fixed this particular recipe. I wanted a curry recipe with potatoes & I'm aware some people may find that odd but you'll find many Asian curry recipes with potatoes and you won't believe how good it is. I looked at 6-8 different Chinese Chicken Curry recipes with potatoes, (including YouTube) and took ingredients from each one. It was the best Chicken Curry I've ever tasted or made and believe me, I've had just about every kind of chicken curry out there, including the recipe I have here on my blog that my mom learned to fix when we lived in the Philippines (1956-1959). This curry recipe is my all time favorite now and I doubt I'll ever make it any other way from now on. It's that good! This is a hearty meal and is good enough for guests. They will be impressed.

Mary Jane's Coconut Curry Chicken
Serves 5-6 People - depending on the portion Sizes (see notes below to double the sauce)

Ingredients
2 chicken breasts (about 3 cups) sliced thin, against the grain (2" pieces)
1 Tb baking soda for tenderizing 
*Note - see below to tenderize chicken. This step is not essential, but believe me it only takes about 1 minute more to do this and it makes a huge difference. You won't believe how tender the chicken will be!

1-2 tbs avocado oil, coconut oil or any other oil 
1-2 cups white potatoes, peeled & cubed
½-¾ cups carrots, chopped
1-1½ cups onions, sliced
1 can water chestnuts, sliced
1½ tbs yellow curry powder
1½ cups chicken broth
½-¾ cup fresh green peas (or frozen)
2/3 cup fresh or frozen green beans, cut in 1½" pieces (you can substitute fresh pea pods)
½ sweet red bell pepper OR green bell pepper, sliced or cut in 1" cubes
1 tsp soy sauce, tamarni or coconut aminos - (GF)
1-2 tsps white sugar
½ tsp garlic powder
¼ tsp powdered ginger
1 -13.5 oz can coconut milk (full fat-not lite)
White pepper powder 
1 tb cornstarch + 1½ -2 tbs cold water mixed together for thickening at the end

Garnish for Top
Chopped green onions
Fresh mango, cut into small cubes 
*Note - you can put the mango on top or even mix it in with the other ingredients, right before serving, as I've seen in restaurants. Do not cook it.

*Cooked rice - my favorite is basmati (I put this on to cook first)

*To Tenderize the Chicken*
After slicing the chicken into thin pieces, place it in a bowl & add 1 Tb baking soda or cornstarch. Mix til coated. If you have some Chinese Shooshing wine, add about a tsp & mix it in. If you don't have it don't worry, it probably won't make any difference. Let this set for at least 15 mins while you cut up the vegetables. After that, rinse the chicken 2-3 times to remove the baking soda. If it's not rinsed you'll taste the baking soda!

Curry Chicken made with Coconut Milk and Mango as a Garnish

Heat oil on med hi in large frying pan or wok. Add rinsed chicken & saute till ½ done. Remove from pan & set aside. Add cubed potatoes & carrots to wok & saute while frying for 5 mins; add more oil if needed. Do not remove potatoes or carrots from pan. (We're just partially cooking them bc they will continue to cook with rest of ingredients). Add  onions, water chestnuts & curry powder; fry for 2-3 mins. Add chicken broth, ginger, garlic powder, soy sauce & sugar. Add fresh peas & green beans (if using) Put chicken back into pan. Heat for a few minutes. Turn heat down and add coconut milk; heat til chicken is done. Add red bell pepper & salt to taste. Add white pepper if you like a little heat. 

To thicken sauce, add the cornstarch slurry (1Tb cornstarch+1½Tb cold water mixed) & stir sauce til slightly thickened. Taste the sauce to see if you need to add more spices to your taste.

*Note* Some people might want to add the mango mixed into the dish, because I've had it that way in restaurants.

Serve over rice. You can add mango, green onions to top. Even peanuts or cashews would be good with this. I love it! 

*Note* If your family likes a lot of sauce, you can make more by doubling the following to the pan.
Double these amounts as you add the ingredients for the sauce: curry, chicken broth, soy sauce, white sugar, garlic powder, ginger, coconut milk. At the end of cooking, to thicken sauce, double the cornstarch slurry and add to the pan.

Saturday, January 6, 2024

Coconut Curry Thai Chicken or Shrimp Soup


My Version of Thai Coconut Curry Soup 

I made this Thai Coconut Curry Soup with Shrimp and Chicken for my daughter, Jamie and her family. My sister, DonnaGay, ate it too, when she was visiting me. Everyone loved it! I love it too!

I just can't get enough of this delicious soup! Before I made it the first time I looked at many recipes on Pinterest and on YouTube and took the ingredients I thought I would like best. I've made it probably 8 times now and tweaked it til it was just right! I go by my taste but you may want to use less or more of some ingredients. 

My recipe makes about 6-8 servings, depending on whether this is a main dish or a small bowl before a meal. Cooking rice and putting 3-4 tablespoons in each bowl before the soup, will make this go further. (I love it with rice!)

 Note: I know shiitake mushrooms are expensive & if you cannot find them you can use any other kind of mushroom, but I LOVE the taste of shiitake mushrooms. You could even buy then dried at an Asian grocery store. 

INGREDIENTS 

1 Tablespoon oil (more if needed). I use avocado or olive oil.

1 Tablespoon fresh ginger, grated (could use ginger in the tube or ginger powder)

1 Tablespoon lemongrass in the tube (produce section)

1 Tablespoon yellow curry powder and

1 Tablespoon red curry paste

3½ cups chicken broth (I use powdered mixed with water)

3  Tablespoons fish sauce

1 Tablespoon brown sugar

½ lb fresh Shiitake mushrooms, sliced

2 cans (13.5 oz each) Coconut milk (not lite!)

1 lb shrimp, cleaned (make sure you clean off the shells and devain them before putting in the soup OR buy them frozen already cleaned

OR  

1 lb boneless chicken, cut into ½" squares Note: sometimes I use both chicken AND shrimp!

¼ teaspoon garlic powder (or to taste)

2 tablespoons lime juice (fresh or in the bottle)

OPTIONAL: ½-¾ cup Red bell pepper, sliced into ¾" slivers

Salt to taste

Green onions, chopped as a garnish for each bowl

OPTIONAL: have white pepper available for anyone who likes a little heat, to sprinkle on their soup

OPTIONAL: cooked rice to put in the bottom of each bowl, before putting the soup in the bowl. My favorite rice is Basmati!

DIRECTIONS

Heat coconut oil in large pot on low heat. Add 1 Tb lemongrass, 1 Tb grated ginger, 1 Tb red curry paste and 1 Tb yellow curry powder to oil. Do not let it burn. Add a little more oil if needed.

Add chicken broth, fish sauce and brown sugar. Bring to a simmer and heat to dissolve sugar for about 5 minutes.

Add mushrooms and heat (simmer) for 5-10 minutes or till mushrooms are soft.

Add coconut milk and heat

Now add the shrimp or chicken. If chicken is raw, simmer till it's done (maybe 5 minutes or longer). Then add the shrimp if raw. It takes much less time to cook (maybe 3 minutes)

Ad red bell pepper about 5 minutes before soup is done. You don't want it to get too soft.

Add salt to taste

Add garlic powder to taste

Add 2 Tb lime juice

Taste everything to see if you need to add more of any seasonings (lemongrass, curry powder, ginger, fish sauce, garlic powder, salt or lime juice). 

Put a little cooked rice in bowl before adding soup. Then add chopped green onions to top. Or another idea is to add oriental noodles to the soup. (I use GF rice or shiitake noodles)

I hope you like this!


Wednesday, November 9, 2022

Low Carb Avocado Chicken Wrap


Avocado Chicken Wrap with Grain Free Egg Tortillas

I finally found a way to eat a healthy quick and easy wrap. It doesn't matter what kind, whether it's Mexican, Asian, Italian of fresh traditional wraps such as chicken or any other meat. I'm on the AIP Autoimmune Protocol which is so similar to Keto since I have to eat grain and dairy free because of intolerances that have caused my health to go downhill. So that means I can't have the typical rice tortillas or wraps. I found a wrap by accident when I was looking around at Fresh Thyme Market in Beavercreek, Ohio, called EggLife. They're made from egg whites and i have no idea how they did it but they don't even taste like eggs and they're very soft and easy to roll up. They have 4  versions and 2 of them are plain and Italian. 

Here are the ingredients I used to make this Chicken Wrap and it was delicious!

Avocado Chicken Wrap

Chicken  (can use rotisserie, frozen grilled strips or any other cooked chicken)

Ranch dressing (or ranch sauce made with a mixture of dry ranch seasoning mix, mayonnaise and milk)

Bacon (cooked)

Avocado, sliced

Red or sweet Vidalia onions, chopped

Feta or any other white cheese such as provolone, mozzarella or Monterey jack

Tomatoes chopped

Lettuce, shredded (I added argula to mine)

I layered my ingredients on the Egglife wrap (see picture below) which is about the size of a large taco but if you don't have to eat wheat free, do it this way below.

If using a larger 10"-12" tortilla

Layer your ingredients in the center of your tortilla and roll it up or fold it up the same way you would a burrito. You can eat it as is, or brown the outsides in a frying pan with butter to brown a little on the outside. 

Most grocery stores carry these


Tuesday, June 7, 2022

My Favorite Moo Goo Gai Pan

 To see more of my Recipes, look at the column to right of this post and scroll down. There are Chinese, Mexican, Italian, Thai, Filipino, Romanian and Southern Cooking Recipes.


Moo Goo Gai Pan
(Served over White Rice)

Note
This will take approx 1½ hrs to make, unless you cut up the vegetables and chicken the night before, but once everything is cut up and the sauce is mixed up it takes only about 20 mins to cook everything together in the wok or large skillet. 
Even though his dish ordered in a Chinese restaurant doesn't have a lot of flavor, it's the healthiest of them all. I assure you, this sauce has more flavor. The Chinese cooking wine is optional but I think it helps add to the flavor. Also some people may not like sesame oil as much as I do but that's what gives it an authentic taste. I'd never make any Chinese dish without it!

Serves 5-6
Double this recipe if you like large servings and want leftovers. I usually make 1½ of this recipe (1 recipe + half of that) for 5 adults and there is always plenty. You might even want to just double the sauce.

INGREDIENTS  


  • * 1 lb chicken breasts (or tenderloins), thinly sliced "against the grain" (see the video at bottom of this post how to do that and tenderize below for 30 mins ahead of time)
  •  
  • To tenderize chicken - mix the following 2 items in with the chicken (making sure it's all coated) and put in refrigerator for 30 mins. 
  • *1 egg  white (I've used the whole egg and it was fine, but actually you don't even need to add the egg. Most Chinese only use cornstarch to "velvetize" the chicken but some add other things for more flavor)
  • *1-2 Tb corn starch or baking soda 
  • Note: there are tons of videos on YouTube on how to do this. There are many different ways. Some people add rice vinegar, soy sauce or Chinese cooking wine to give the chicken more flavor. Sometimes I might add one of those but it's not really necessary. If using cornstarch you don't need to rinse the chicken after 30 mins but if using baking soda, you will need to rinse the chicken and pat it dry before cooking)

  • *1 Tb avocado oil or veg. oil 
  • *3 tsps chopped garlic
  • *½-1 tsp minced ginger (I use the tube you can buy in the produce dept)
  • *2 cups sliced mushrooms (I use Shitake or Bella but you can also use canned)
  • *1½-2 cups snow peas (the flat ones-not sugar snap peas)
  • *¾-1 cup thinly sliced carrots
  • *1 cup baby bok choy, cut into 1" squares
  • *1 can sliced water chestnuts, drained 
  • *1 can bamboo shoots, drained 
  • * 1 can Baby corn, drained
  • *Salt and pepper to taste
  • Note: You don't have to put all these vegetables in. Just use the ones you like, but the pea pods and carrots give it color.
  • For Garnish on top: 
  • Chopped green onions and toasted Sesame seeds (Asian section of store)

  • SAUCE  (Mix this ahead of time, while chicken is cooking)
  • *1½ cups chicken stock or broth (I use the instant granules in the jar)
  • *3 tsps sugar
  • *1 Tbs Chinese cooking wine (I use ShoaXing - see note below)
  • *1½  Tbs Coconut Aminos or Soy Sauce 
  • *5 tsps sesame oil (it's imperative that it is "toasted" sesame oil. I bought some 1 time that didn't say toasted and it had no flavor and was just like other oils but the "toasted" is used just for flavoring)


  • Mary Jane's Moo Goo Gai Pan (translated Chicken with Mushrooms)

INSTRUCTIONS  

Note: I usually put the rice on to cook after I set the chicken aside to tenderize. I cook  2 cups "dry" rice (with designated amount of water) which is supposed to make about 6 cups cooked rice but seems like there's never enough rice so next time I'm going to make more rice)

  • Whisk together the egg and 1 tb cornstarch. Coat the chicken using a spoon or your hand. Set aside for 20-30 mins. After 30 mins drain out any excess liquid, but do not rinse chicken. (unless tenderiziing with baking soda)
  • In wok or large pan, heat 2  tsps avocado or veg oil over med heat. Add carrots, bok choy (if using) and 2 Tbs of water. Cook 2 minutes, stirring constantly. (You do not want to cook them till done because they'll cook more later and are supposed to be crisp).
  • Add fresh mushrooms and cook for 3 mins til mushrooms are tender. If using canned, add them  in next step.
  • Stir in water chestnuts, bamboo shoots and/or baby corn. (if using canned mushrooms add them now too). Add snow peas and cook 1 minute.
  •   Season vegetables to taste with salt and pepper.
  • Remove vegetables from pan and place in a bowl. Cover to keep them warm. Veg will be added to chicken after its cooked.
  • Put 1 Tb oil in wok and heat on med high heat.
  • Add chicken to pan, seasoning with salt and pepper. Cook, stirring, til chicken is cooked through, 4-5 minutes. Add garlic and ginger, cooking for 1 min more or til pink is gone in chicken. 
  • While chicken is cooking, make the sauce - in a bowl whisk together chicken stock, sugar, coconut aminos (or soy sauce) and toasted sesame oil. Taste to see if you need more of any ingredient. Whisk in 1 tablespoons cornstarch. Set aside.
  • Add vegetables to pan with cooked chicken and heat everything together about 1 min. Stir sauce again and pour in pan and heat, stirring about 1 minute or til sauce starts to thicken.
  • Serve immediately, over rice, because you don't want the vegetables to get cooked anymore. Add chopped green onions and toasted sesame seeds to top of each serving. 
  • Important: The key to making this dish good is to NOT cook the vegetables too long. You want them to be crisp and crunchy.
  • Where to Find Chinese Ingredients: most of the ingredients you need to make any Chinese dish can be bought in the Asian section of your grocery store, but if you have an an Asian grocery store near you, they should most definitely have everything you need.  
  • Video on how to cut the chicken against the grain and also how to tenderize the chicken or what the Chinese call "velveting".  https://youtu.be/G5UvqrlI_MM          Another good video: https://youtu.be/GfPNbtCJqOk

Friday, May 20, 2022

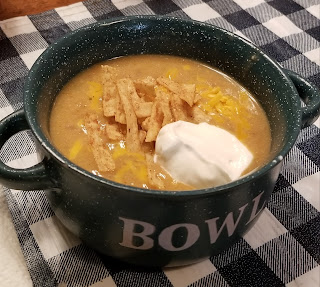
White Chicken Chili with Salsa Verde and Beans


White Chicken Chili with Green
Salsa and Beans

I've made White Chicken Chill before but couldn't find the recipe I liked on Pinterest. So I decided to just make my own and now it's my favorite! Everyone was raving about it, saying "You've got to make this again!" I didn't want to forget what I used so decided to put it here on my blog while it's still fresh in my mind.  I hope you like it! Sorry i didn't write down the amounts of each thing.

White Chicken Chili

Onions, garlic (saute with olive oil)

Add: chicken broth, 1 jar green chili salsa, cream of chicken soup, corn, beans (white or black), sour cream, cream cheese, Rotel (optional) cheddar cheese. You could add cumin and chili powder like I've done before, but this time I didn't do that).

Then add: cooked chicken (I used rotisserie chicken), lime juice to taste.

Serve with (on top): diced avocado, tortilla chips, more cheese and cilantro if desired.


Saturday, September 4, 2021

Avocado Chicken Salad


Avocado Chicken Salad
(Gluten free)

This is a chicken salad I came up with because I love avocados with anything! But also I fell in love with the stuffed avocado chicken salad I ate in Lima, Peru. I visited there 2 summers when my parents lived there years ago. The Peruvian version was absolutely delicious and I have not been able to find a good recipe for it. So I've made my own version and it's addicting!

Avocado Chicken Salad

* Cooked chicken, chopped 

* (I use rotisserie chicken to make it more convenient, plus it's delicious!)

* Avocado cut in small squares

* Celery, cut into small pieces

* Toasted slivered almonds (or pecans)

* Dried cranberries, chino them if they're too big

* Green onions, sliced

* Mayonnaise I use GF Duke's or Hellmans)

* Salt, if needed

Note: you can add any fruit like pineapple, grapes, mango or oranges. The reason I don't add fruit to this recipe (other than the cranberries) is because I have a different chicken salad I call Fruited Chicken Salad, that is also delicious but very different from this recipe. It has a secret ingredient that makes it special.

Mix everything together and serve inside a halved avocado, with crackers or on bread. I eat it with my favorite gluten free Sesame Rice Crackers (Savory Thin) from Trader Joe's.

So Delicious Avocado Chicken Salad with Dried
Cranberries, Green Onions, and Almonds


Wednesday, December 5, 2018

Classic Chicken Divine

  1. Classic Chicken Divine
    This is a classic recipe popular in the 1950's and 1960's. My mom fixed it regularly when I was growing up. Recently I posted about it on Facebook and some of my friends asked for the recipe. Many of the recipes on Pinterest do not call for curry powder and some call for mushroom soup instead of cream of chicken soup. I'm sure it's great that way too, but in my opinion, this is the best recipe. I hope you enjoy it!

  2. INGREDIENTS
  3. 20 oz frozen broccoli or a  lg fresh bunch of broccoli
  4. 2-3 cups Chicken breasts, slightly cooked & cubed (it will cook more in the oven, so no need to cook it more than 10 minutes)
  5. 2 cans Campbell's cream of chicken soup, undiluted
  6. ½-1 cup Hellman's Mayonnaise (I use 1 cup)
  7. 1½ tsps fresh lemon juice (to taste)
  8. ½ tsp curry powder (or more to taste)
  9. 1 cup shredded original Velveeta cheese ( can use sharp cheddar cheese but I like Velveeta better)
  10. 1-2 cups bread crumbs
  11. 3 tbsp butter, melted
Directions 
Preheat oven to 350°. Thaw frozen broccoli, but don't cook it. If you are using fresh broccoli steam it just till tender, but not too long because it will cook more in the oven; drain. Arrange in greased shallow casserole pan. I use my glass 9"x13" pan. Layer cut up chicken on top of
Broccoli. Combine lemon juice, soup, mayonnaise, curry powder and cheese. Spread evenly over chicken. Mix bread crumbs and melted butter and sprinkle over top. Bake for 30 minutes or til brown on top. I like to serve this on top of rice. Serve immediately.


Wednesday, May 16, 2018

Best Authentic Fried Rice

Mary Jane's Authentic Chicken
Fried Rice Before Green Onions are Added

The reason I say "authentic" fried rice is because even though I'm American, born in the US, my family lived in the Orient for 3 years when I was a child. We lived in Zamboanga City, Philippines where we ate Chinese Fried Rice along with other dishes at a Chinese restaurant every Sunday after church. The restaurant, at a Hotel on the edge of the water, sat overlooking the Pacific ocean. Such a beautiful, peaceful scene engraved in my memory, is hard to describe. And OH, the smell of that Chinese food is something I've rarely experienced in the US and I can always tell by the smell, if its going to be authentic or not! . 
A very poor, sweet, little old lady insisted on paying for our family (of 6) to eat there at her expense. "Auntie" was so special and thoughtful to do that for us. We learned to love Chinese food there but we also got to visit Hong Kong and Japan. The Filipinos had their style of fried rice too (usually with shredded cabbage, garlic and bok choy) so we got to experience different types and flavors. 
It's really difficult, though, in my opinion to find what I call  that "authentic" Chinese taste. I've had 100's of different versions of fried rice over the years, whether it be at a restaurant, in cookbooks or the web. I was never satisfied with the taste til I decided "toasted" sesame oil was the ingredient that made Chinese food taste authentic to me. Some people don't use as much in their recipes as I do, but I use a lot of it, even more than what I wrote down for this recipe. So add more if you want! You won't normally see water chestnuts in fried rice, but I love it for the crunch. The onions and garlic, though,  are always in authentic fried rice. You can cook your plain white rice the day before (rinsed 2-3 times first) or you can cook the rice the same day you make the Fried Rice. It's perfectly ok to cook the plain white rice the same day as long as you separate it and maybe dry it out in the oven on a cookie sheet first or some people put the cookie sheet in the fridge. It turns out just as good when I don't rinse the rice or cook it the day before, but rinsing it first takes some of the starches out, which helps it not stick together.

Mary Jane's Authentic
Chinese Fried Rice
Another secret is to use a good rice and my favorite with any dish is Basmati, long grain rice used in Indian cooking that has a nutty taste. It costs more but believe me when I say it is totally worth it! Most Chinese restaurants use a combination of long grain and Jasmine rice. And lastly, I want to say I use this Chicken Fried Rice as a main dish. Please don't put a totally different Chinese dish on top of this. It should stand alone! All the other Chinese dishes such as Cashew Chicken, Kung Pao Chicken, Sweet and Sour Pork, Moo Goo Gai Pan, Almond Chicken, General Tso, Szechuan or Mala Beef and Green Beans, Orange Chicken and other dishes need to be put over steamed rice or what many people call white rice. There are just too many flavors in fried rice that will compete with these other Chinese dishes. They have their own unique flavor. Steamed rice allows you to taste the flavors of the dish you put on top of it. I'm real touchy about this subject! I think  Asian people would agree!

* Whatever you do, do not leave out the TOASTED sesame oil. It might have the word REAL or ROASTED on the bottle *

Ingredients - feeds 6 

Very Important - chop your vegetables up first and place in separate bowls. Then mix the sauce in a bowl and the seasonings in a different bowl and set aside.

Peanut or any neutral oil
Butter
1 cup onion, chopped
3-4 cloves garlic, chopped
2 tsps ginger, chopped
4-5 cups cooked cold rice 
2-3 cups fresh chicken breast, cut in          small pieces & set aside in a bowl so        you can tenderize it for 15-30 minutes.    See my note below of how I                        tenderize/marinate it. This step is            optional, but it will be much more             tender and is totally worth it!
FOR A QUICKER VERSION use already cooked frozen chicken, chopped
4 eggs, scrambled
1 can water chestnuts, sliced into strips
¾ cup frozen corn and also 1½ cups           frozen peas and carrots, thawed 
1 cup fresh bean sprouts (it's not easy to find these fresh but an Asian grocery store will have them)

SAUCE - (mix together in separate bowl and set aside). See NOTE about soy sauce bellow.
1½ tsp brown sugar, 4-6 tsp lite soy sauce (or coconut aminos), 1½ tsp dark soy sauce (less salty), 4 tsp TOASTED Sesame oil

SPICE / SEASONING MIXTURE - (mix   in separate bowl and set aside)
2 tsp salt, ¼ tsp ground white pepper, 1 tsp MSG (unless you need it to be GF) 

For Garnish
1-2 Tb toasted sesame seeds
6-8 green onions (raw), chopped 
 (for top after fried rice is cooked. Some    Chinese chefs put the white part of the    green onion with the rice as it's frying    and sprinkle only the green part on         top at the end)

OPTIONAL: after fried rice is done, taste it and add any of the following if you want more flavor)
Oyster sauce, Hoisen sauce and/or Chinese Shaosing cooking wine (most Chinese use this in their fried rice), chili garlic sauce, dash of garlic powder, onion powder, ½-1 tsp fresh grated ginger (I don't like ginger but sometimes use powdered ginger or in the tube), fish sauce. The Chinese use white pepper a lot in their cooking, which gives it a distinct, spicy flavor.
Note: sometimes I use chopped pork, ham, bacon or shrimp, but my favorite is chicken. A combination of pork, chicken and pork is great! To make it even more authentic, marinate pork in Chinese BBQ sauce before frying

NOTE : ABOUT SOY SAUCE
Do not use Kikkoman soy sauce in this fried rice because it's a Japanese soy sauce and has a different flavor profile than Chinese soy sauces and not suited for Chinese style cooking. Lite soy sauce is saltier than dark soy sauce, which is slightly sweeter.

NOTE- TO TENDERIZE MEAT
I used an Asian tenderizing technique called "velveting", which is totally worth it. That's how meats in Chinese dishes are so tender. You just cut up the meat in small pieces (against the grain) and soak it in the following for 15-30 minutes: 3 tsps cornstarch OR baking soda,
 instead of cornstarch, I could taste the baking soda (after being cooked) and rinsed it off the next time I tenderized the meat. Actually, it's ok not to use baking soda at all, because the cornstarch and other ingredients tenderize the meat just fine.
Mary Jane's Authentic Fried Rice


DIRECTIONS:

Make sure your onions, garlic, water chestnuts and chicken are cut up into separate bowls before you start anything. Believe me, prepping ahead of time will make this easier. 

      This is just some of the  ingredients I  use (I will update these ingredients 
as soon as I can)

Cook cut up chicken in oil on medium high heat in frying pan or wok till 90% done. Remove chicken to another bowl and set aside. In same pan, add 1 tb oil and fry onions, ginger and garlic for 1-2 minutes til tender. Remove this and add to chicken. Next, quickly fry the sliced water chestnuts in same pan then remove and add to chicken. Add another Tb oil to wok and fry the peas, carrots and corn to get them warm for 2 mins. Remove from pan and add to chicken. Put a little more oil in the same pan. Put on medium low and scramble the eggs, stirring constantly. Add to chicken and other ingredients. 
Add 1 Tb butter to wok (helps to brown the rice) and turn heat to high. Add half the rice and stir fry til it is separated and heated. This would be a good time to add half of the meat, ½ vegetables, ½ the eggs and ½ other ingredients that are in sane bowl. After mixing and stirring around while frying the rice on hi heat, remove the rice mixture to another bowl. Then add the other half rice, meat, vegetables and eggs. Repeat above. Add first batch of rice already fried to 2nd batch. Now stir in the sauce and the seasonings and add about 1-2 Tbs Chinese cooking wine around outside of the rice to deglaze sauce in hot pan. We are frying in 2 batches because we do not want to crowd the rice. Having too much rice in the pan will cause it not to separate and toast the right way. (Also add Chinese cooking wine and oyster sauce if you think it needs it)

After stiring first batch of rice together with 2nd batch in wok, taste to see if you need more seasonings or sauce ingredients. If you like spicy things, then add more white pepper. Add toasted sesame seeds and stir. Just before serving, toss in the chopped green onions. Serve immediately. You can either purchase sweet and sour sauce or use my recipe, which I will try to add later! It's also good with the Japanese Yum Yum sauce. Enjoy!

UPDATE: (2/6/2019)
Since I fix a lot of Chinese and Thai foods, I received a larger wok for Christmas. I've needed it for years but still have to "season" it before I use it. 
2020 - I finally seasoned my new wok! But it took me practically all day. That thing is heavy so it wore me out, even though I had help!

                         My New Wok!

Another Recipe Idea:
 1. Another great idea would be to Make Steak Fried Rice using this same recipe, but also adding Shitake mushrooms. Get a ribeye steak, freeze for about 30 minutes and then cut it thinly on the grain.
2. If you like cooked cabbage, add cabbage (funny shredded) with the onions and garlic and saute. When I was growing up, my parents almost always added cabbage to their fried rice and back then I did not like cabbage. But I love it now and am going to add that next time I make this. 

Hope you enjoy my recipe! I have done years of research plus trial and error, searching for secrets and tips to the best Chinese fried rice for you. Let me know if you have any questions!


Sunday, January 14, 2018

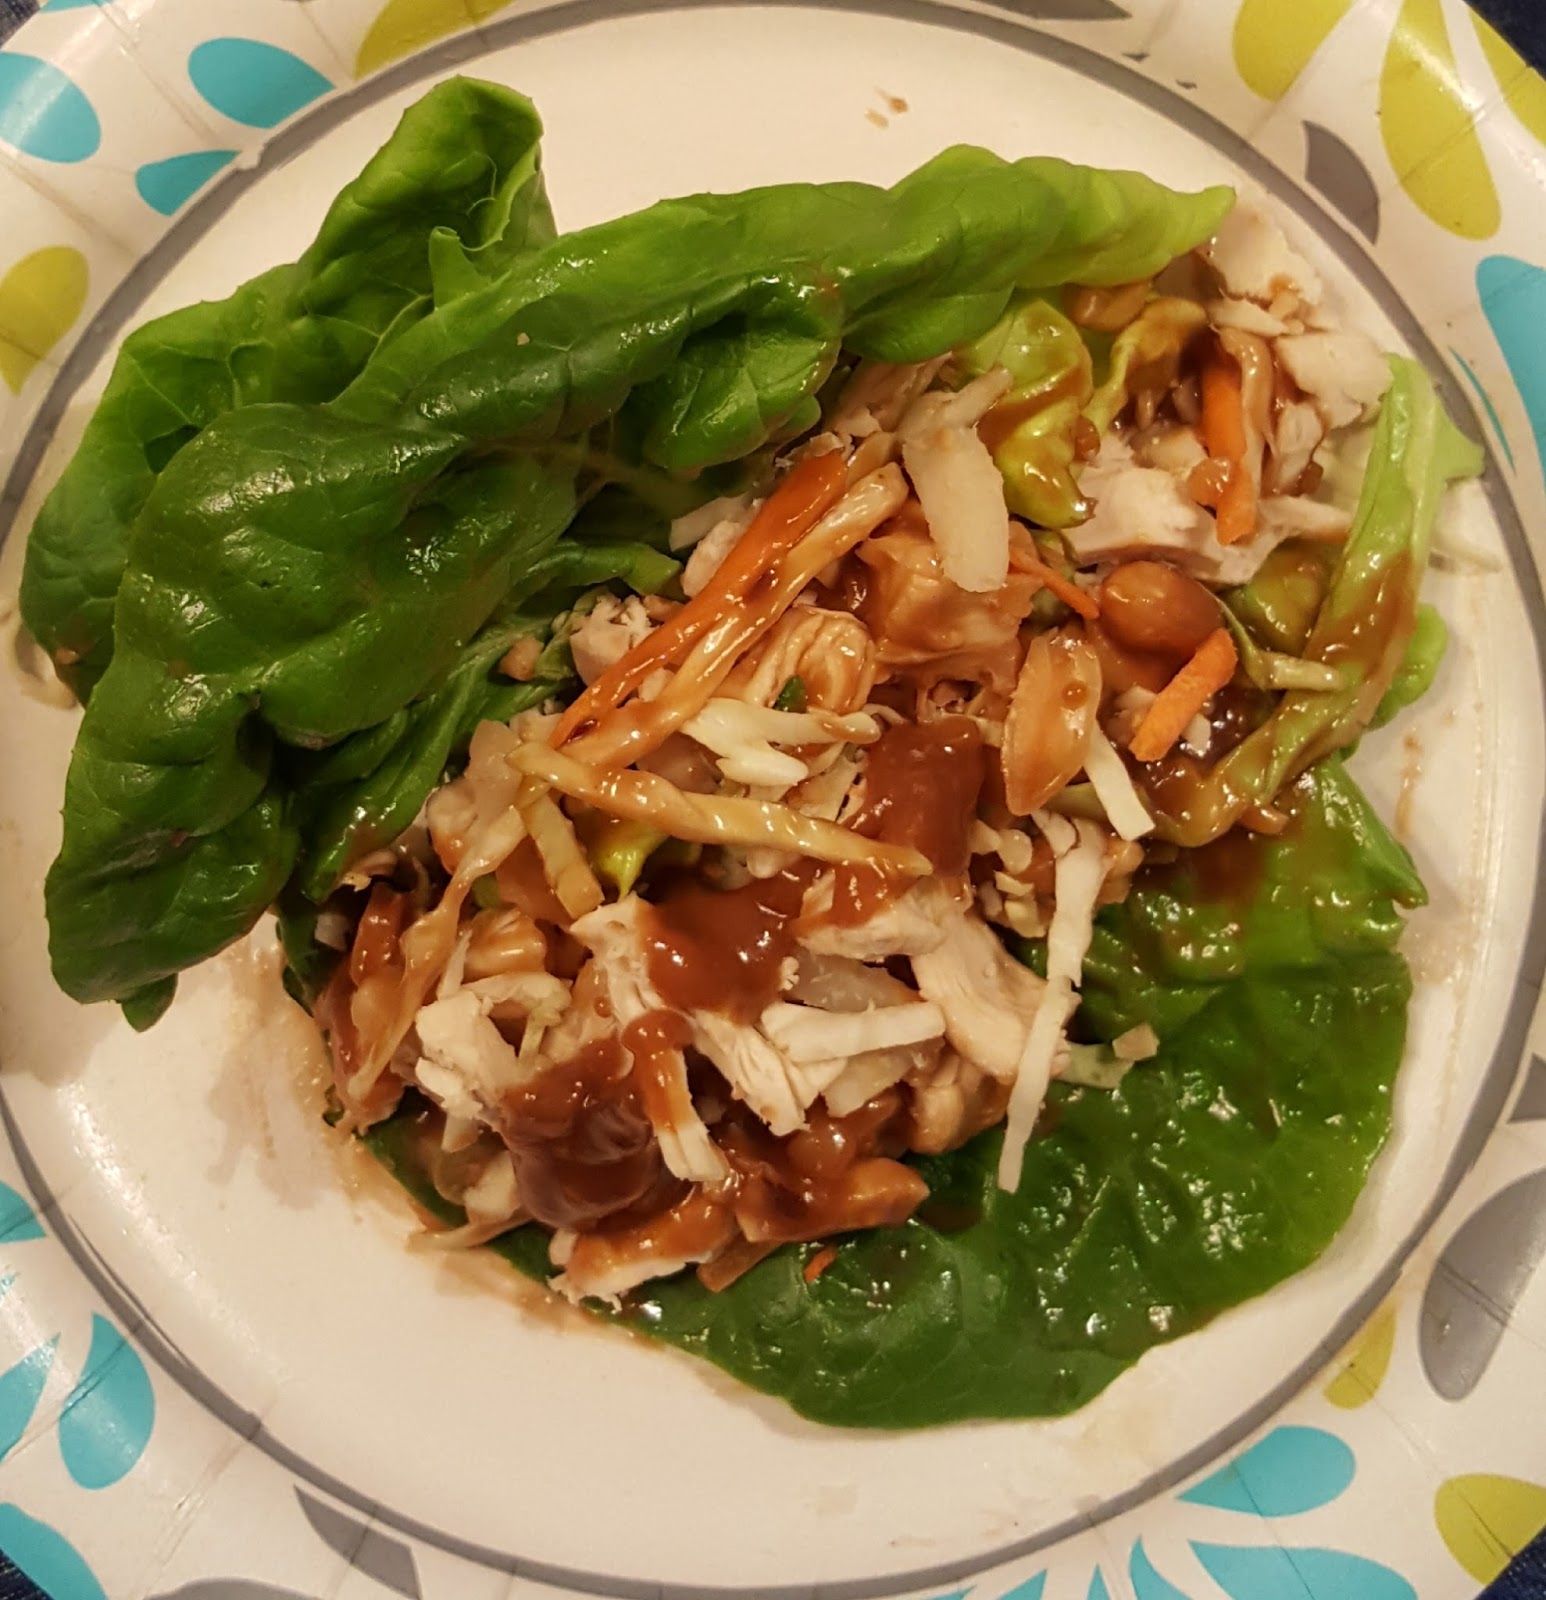
Asian Chicken Lettuce Wraps - Thai Style

Thai Chicken Lettuce Wraps, shown without the flour tortilla

Easy Gluten Free Meal!
If you've never had the priveledge of munching on this delicious light meal, you're in for a treat. It's a healthy wrap, which is great for lunch, snack or an evening meal. Your kids will love it, because what kid doesn't like peanut butter? You'll find other chicken wraps without it, but Thai style wraps almost always have peanut butter as a main ingredient in the sauce.  This particular recipe can be used with a flour tortilla, or wrapped in Boston lettuce (also known as Bibb lettuce). I like to put the lettuce inside the flour tortilla. In my case, I use gluten free tortillas,  since I am wheat intolerant. Many grocery stores carry the GF version, but I find mine at Aldi, displayed with their other GF products. See my new favorite wraps below-Egglife.

I double this recipe when I make it because we like to have some left over for the next day or two. If you plan to have any leftovers, it would be a good idea to keep the sauce separate from the chicken/cole slaw mixture. Then you can just heat up the sauce. We eat the chicken mixture cold with warm sauce, but you can heat up the chicken If you want. It's just that since its mixed with the cole slaw mix, that may not be good warmed. I hope you enjoy this! It 's one of my favorite meals!

These are my new favorite gluten free, grain free tortillas/wraps

Gluten Free Wraps I buy at Aldi grocery store


Gluten Free Thai Chicken Lettuce Wraps

INGREDIENTS

Chicken Filling
3-4 cups cooked chicken tenderloins, chopped in small pieces
1 can sliced water chestnuts, chopped
1½ cups cole slaw mix with carrots
3 - 4 green onions, sliced
4 Tbs chopped peanuts
1 head Boston or Bibb lettuce
Flour tortillas 

Other optional ingredients: (I've seen in restaurants)
cellophane Chinese rice noodles, fresh edamame peas, shiitake mushrooms, sliced red pepper, slivered almonds, sesame seeds, cucumber, cilantro, alfalfa or bean sprouts, fresh chopped snow peas, chopped bamboo shoots

Sauce Ingredients
4 Tbs "Toasted" sesame oil 
1-2 Tbs lite GF soy sauce or Coconut Aminos
4-5 Tbs peanut butter, creamy or crunchy
4 Tbs lime juice
Note: I made this again tonight and didn't realize I was out of lime juice, so I decided to use some rice vinegar and lemon juice instead. The sauce turned out great with this substitute. Nobody even missed the lime juice.
4 Tbs light brown sugar
2 tsp garlic, chopped or minced
1-2 dashes ceyenne red pepper
Note: Tonight I used 1 tsp Chili Garlic Sauce instead and it was great. Just use to taste.

Cook chicken for 15 minutes and set aside to cool. In large bowl, mix together chopped chicken, cole slaw mix, peanuts, water chestnuts and green onions. Taste and see if you need to add any more of the sauce ingredients. I just go by taste anyway.  Tonight I made it again and had to add more brown sugar because I used too much coconut Aminos & it was too salty. In a separate bowl, mix sauce ingredients with wisk. Place sauce in microwave for 2 minutes to warm it.

To Assemble
Layer ingredients on a plate in this order:
Tortilla (warmed in microwave for 15 seconds)
Lettuce
Chicken Mixture
Sauce
Roll up and serve

Saturday, January 21, 2017

Crispy Oven BBQ Chicken


You may think this chicken looks burnt, but I cooked it this way on purpose to make it look and taste like chicken cooked on an outside grill. I know Baked BBQ Chicken is really common and most people can figure out how to cook it themselves. It is common to stick raw chicken on a flat pan and baste with your favorite BBQ sauce, right? I used to do that but was never satisfied with the outcome. We all know that chicken tastes better with the skin on, especislly if its BBQ, but when I cooked it in the oven the way I described, or sometimes in the crock pot, it always came out soggy and the sauce usually fell off and was drenched in a river of chicken broth. Not good.
So I decided to try something that I used to do when cooking BBQ chicken or pork ribs on the grill outside. We would always boil the chicken or ribs on top of the stove in water first, for about 15 minutes. This gave it a chance to cook out some of the fat plus cooking it some ahead of time ensures it will be cooked all the way through to the bone, on the grill, without having to cook it to death, which leaves a hard, dry meat. So today, I had the idea to do the same thing for oven bbq chicken.
 
UPDATE - keep reading after this, but I cooked chicken wings the other day, and did not boiled them in water first. I just baked them in the oven till they were done, turning them over at least once. I believe boiling them may take out some of the flavor of the chicken, but either way they great! I changed the BBQ sauce I like best now too! See ingredients below.

About the last 5-10 minutes, you spread more bbq sauce on and let it cook under the broiler (see full recipe below), searing the sauce and crisping up the skin, the same way it is cooked on the grill. Walla! Success!

I will continue to cook the chicken this way from now on. I would even go so far as to say if you have to leave the house for work, you can cook the chicken in the slow cooker, and put the chicken and sauce under the broiler the same way as described here and it will be great. The broiler is the key!

Crispy Oven BBQ Chicken

Ingredients
1. Chicken pieces (any amount) bone in, with skin (I prefer thighs, wings and legs since they don't get too dry)
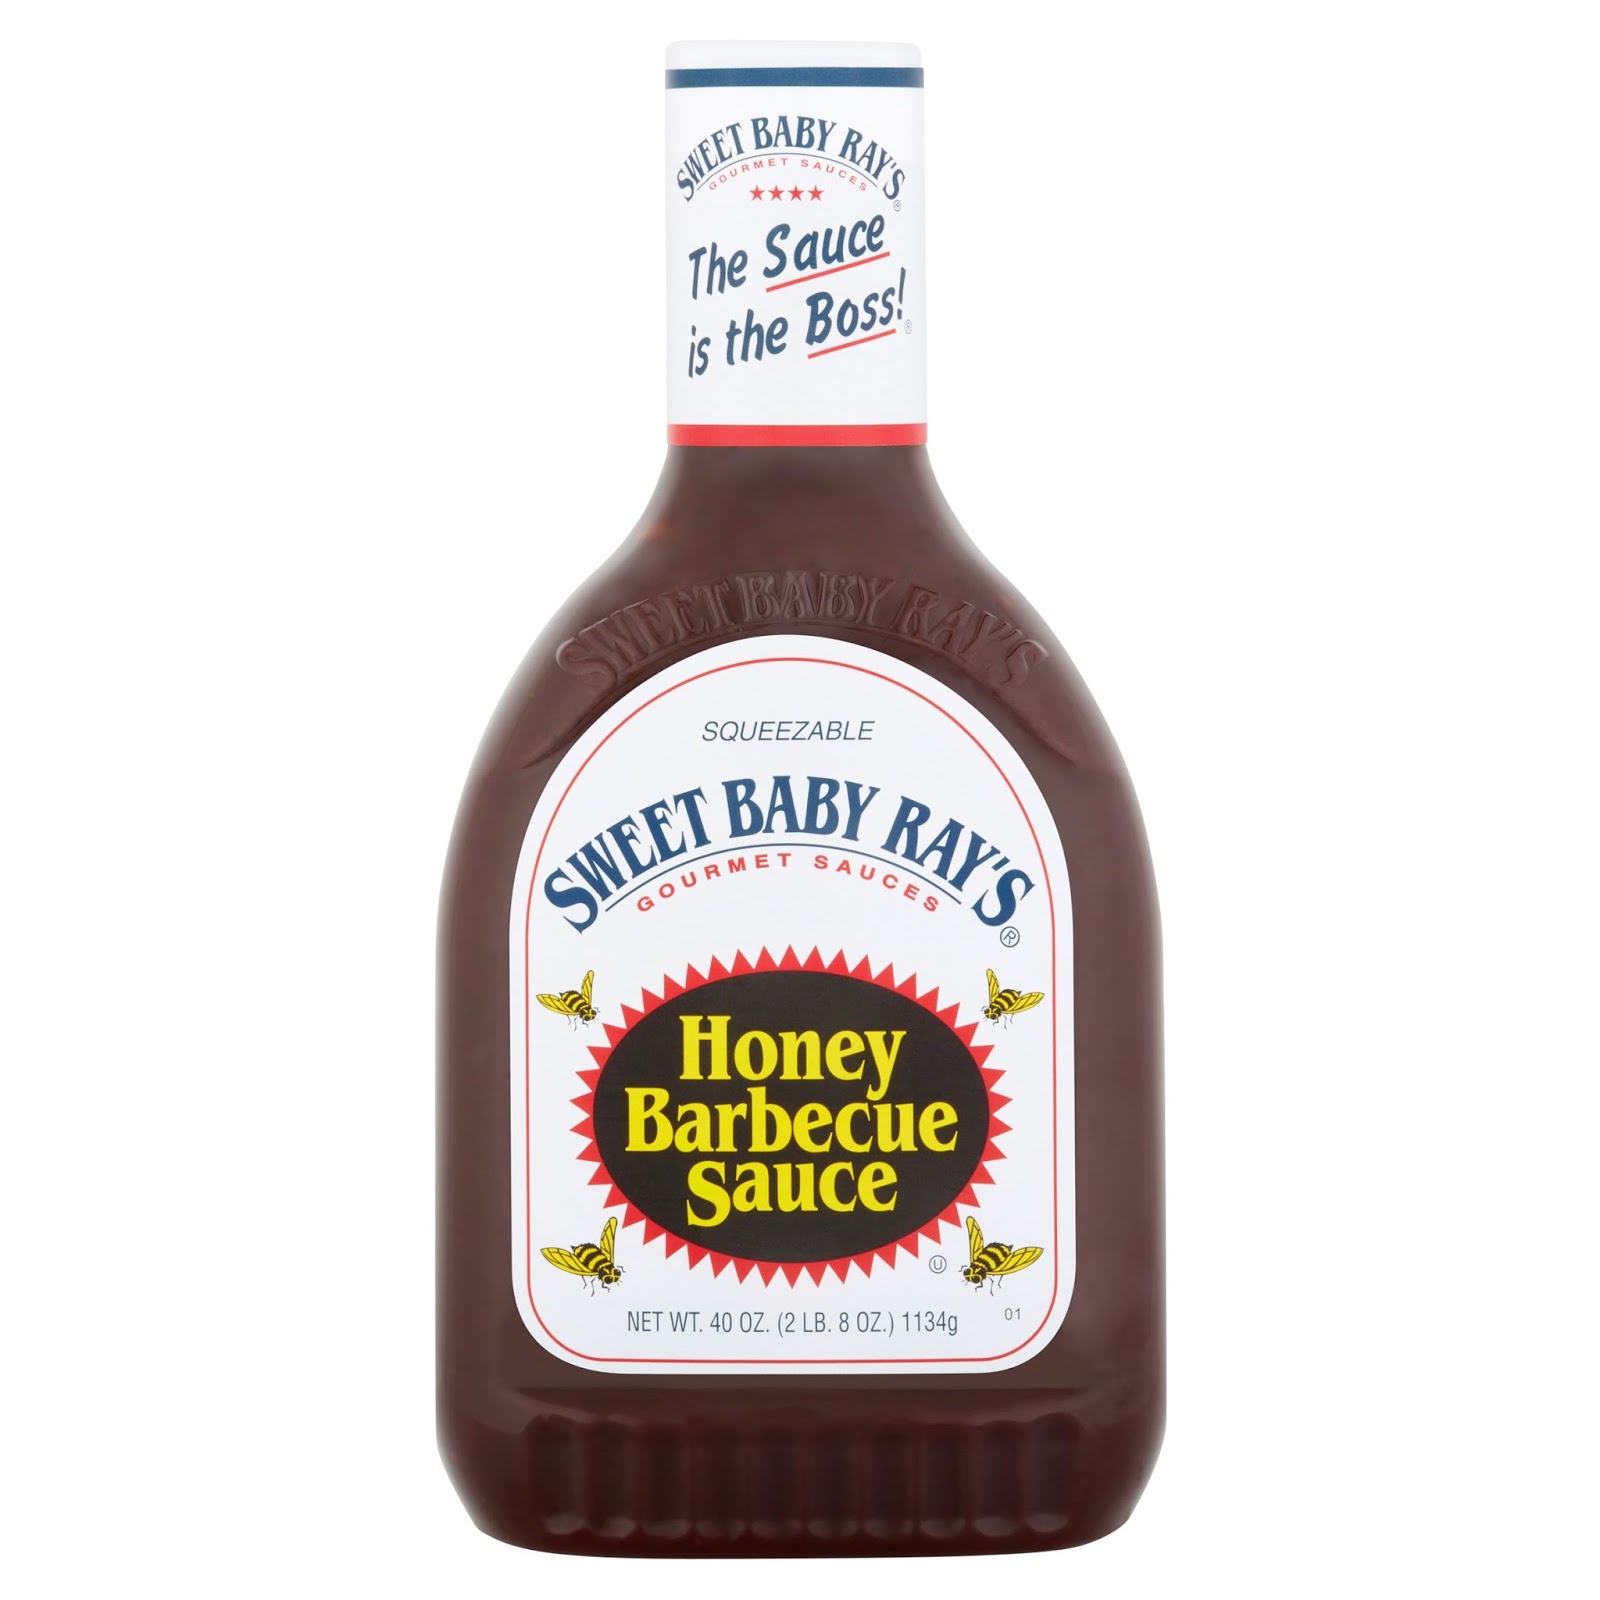
2. Sweet Baby Rays Sweet and Spicy BBQ Sauce Or Sweet Baby Rays Honey BBQ sauce. I love the spicy!

Preheat oven to 400º. While the oven is heating, place chicken pieces in a pot covered with water on top of the stove. Add a little salt and let it come to a boil. Turn the heat down a little and let it boil for about 15 minutes.
Drain the water and pat the chicken dry with paper towels. Place it, skin side up, on a broiler pan with holes or on a rack in a large flat cookie sheet with sides to catch any excess liquid. (See picture of pan and rack I used in picture below)

Squirt bbq sauce from bottle onto chicken. It will be thick and that's great. You can leave it that way or spread it on with a brush. Place chicken in oven on the middle rack and cook for 12 minutes. After 12 minutes, turn chicken pieces over and put bbq sauce on that side same as before. Cook 12 minutes. Turn chicken over again with skin side up, adding more sauce. After about 10 more minutes, take chicken out and add more sauce. Turn oven temperature to broil. Place oven track at highest point and place chicken under broiler. Cook under broiler for 5-10 minutes, searing sauce and crisping up skin. You need to keep a close watch on the chicken, checking it often, because it will be very easy to burn it. I kinda like that but you may not! Cool a few minutes before serving and serve with potato salad.

I used this rack and you can see how it still had liquid that drained. Believe me, the chicken was still very tender and juicy!

My Potato Salad