Welcome to my blog!

Welcome Friends! Please be patient while I add more info. I have SO much to share with you. Thanks for visiting!
Showing posts with label Crochet Hats. Show all posts

Thursday, March 5, 2026

FREE Crochet Peek A Boo Hat Pattern


Peek A Boo Crochet Hat
FREE pattern
By
Mary Jane Hall

Several years ago, my crochet Shrug pattern, pictured above, was published in Kim Werker's, book "Get Hooked Again", as a follow up to her book "Let's Get Hooked", that was highly successful. Both books have easy patterns for beginners, with designs especially appealing to teens.

My shrug pattern (above) was published in the book, but they didn't have room for the matching hat pattern, so they posted it as a free pattern on Kim's blog, which is no longer available. 

A crocheter, on Ravelry, wrote me today saying she was having trouble finding my free pattern, as it was no longer available. So I set out to find my original pattern and thought I'd post it here on my blog. 

You can find my FREE pattern for the Peek A Boo Crochet Hat HERE.

Peek A Boo Crochet 
Hat Pattern

By
Mary Jane Hall


Wednesday, December 22, 2021

Newsboy Cap in Positively Crochet

Newsboy Cap in
Positively Crochet!


The picture of this hat in the book, Positively Crochet! shows the model wearing a belt to match. The publisher did not have room to put that pattern in the book so they asked me to put the pattern here on my blog. The pattern for the belt is here.

I used Lion Brand BouclĂ© Solids yarn on this project. It is a super bulky yarn which causes the pattern to go much faster, but at the same time, it's more difficult to see the stitches and you kind of have to go by "feel". This is not as hard as it sounds and doesn't take long to get the hang of it. One reason this hat is much easier that anything  else that's round or in a circle, is because there are "sets" of stitches that you work, then there's a ridge, then you do the exact same set of sts over and over all around, so you're not having to count a lot of sts around the whole circle, which is so easy to lose count somertimes, as I'm sure you know. See more info below. 


Newsboy Cap

Crochet
August 2007
Lion Brand Boucle Solid
Super Bulky (5-6 wpi) ?
Flag of EnglishEnglish 

Even though boucle yarn makes it difficult to see the stitches, this hat is worked in such as way that makes it very easy to follow.
I found an error on round 1, so please see the corrections on my blog HERE before making this hat. A section in parentheses was left off.

You may be like me and do not like working with boucle yarn. It seems like it would be difficult to work especially in the round with this hat. But it’s not as difficult as you may think. You do have to kind of feel the stitches, but it’s not hard to keep up with the number of stitches, because there is a space between each set of stitches that make up a pie shape. Just as the puff stitches do that with the purple newsboy cap (making it easy to count) that’s what the spaces do on the pink hat. You can’t see the spaces right now because when I was finished making it, I took yarn and wove it through the spaces, making a ridge as I was covering up the holes.

Many have asked about the belt shown. The instructions for the belt are not in the book, but they are listed on my blog HERE.
Please let me know if you have any questions.

Thursday, October 11, 2018

Peek A Boo Crochet Shrug and Hat

My Peek  Boo Shrug Design published in Kim Werker's Book, Get Hooked Again.
See link to FREE hat pattern below.

Many of you have probably heard of Kim Werker, who actually started the famous blog she called "Crochet Me". There are  many free patterns  posted, as well as paid patterns and all kinds of info about
crochet. After a few years she retired from that blog and it is now run by Interweave Crochet. 

 But years before she retired, Kim wrote her book Let's Get Hooked, which was geared 
more for young women. The designs would actually appeal more to teenagers. Then later, she decided to do Get Hooked Again! and she opened it up to other designers. So I submitted this shrug and skull cap and she accepted both for the book. There wasn't enough room in the book for the hat, so the free pattern  for my hat is Here


Free Crochet Pattern
Peek A Boo Hat by 
Mary Jane Hall

Sunday, August 27, 2017

Newsboy Cap and Medallion Belt - Free Crochet Pattern by Mary Jane Hall

Newsboy Cap Pattern by Mary Jane Hall - Free Crochet Pattern
This Newsboy Cap pattern I designed was published in a hardback book called Hooks Only Crochet, From Start To Finish, in 2006. It is now being offered as a FREE Crochet Pattern! Link for the free psttern is HERE at Annie's website, who now publishes the ever so famous Crochet! magazine. 

This cap pattern is unique in that you create "pie" shapes and then put them together. Now if you do not like the idea of sewing anything together, this pattern may not appeal to you, but I promise, it will look unique and different from all the others! You have the option of sewing with a large yarn needle or sewing the shapes together with a crochet hook. Instructions are also given to make the button on top. By the way, I designed a belt to match! Free pattern for belt is HERE.
See more photos below.

Pie shapes are crocheted, then sewn together to form a hat.
Newsboy Cap by Mary Jane Hall - Free Crochet Pattern


Monday, March 4, 2013

Newborn Mountain Hat with Earflaps - Free Crochet Pattrrn


       Design by Mary Jane Hall

Description: It’s hard to find such a cute hat in a newborn size, and it will turn heads for sure! For a larger size hat, use a larger hook or bulky yarn using these instructions. If you want to make the hat in a smaller size to fit an American Girl Doll, you can use a smaller yarn such as a sport wt and a smaller hook.

I'm happy to share my pattern with you, but you aren't allowed to sell this written pattern or make the hat and claim it as your own Design. Of course you can make the hat and sell the actual project. It's not required but it would be courteous of you to mention my name as the designer to give me credit. Doing this will make me even more happy to give free patterns that will bring crocheters to my blog.  Thank you for respecting the copyright laws. Also, you aren't allowed to post the actual pattern on your blog or website but you can post a picture of the hat and link on you blog to direct people to this pattern, mentioning my name.

Fits size: 0-3 mo

Materials
Classic Worsted Tapestry by Universal yarn; you’ll need approx ½ of a 3.5 oz/197 yds/100gm/180 meter skein in Wild Aster, color # 7020


Crochet Hook size I               
Yarn needle

Instructions
Rnd 1: Ch 2, 8 hdc in 2nd ch from hook. Do not ch 1, pm in 1st hdc on each rnd so you’ll know what rnd you are on – 8 hdc
Rnd 2: 2 hdc in each hdc around – 16 hdc
Rnd 3: 1 hdc in 1st hdc, * (2 hdc in next hdc, 1 hdc in next hdc) Cont from * around - 24 hdc
Rnd 4: * 1 hdc in 1st 2 hdc, 2 hdc in next hdc, cont. from * around – 32 hdc
Rnd 5: * 1 hdc in 1st 3 hdc, 2 hdc in next hdc, cont. from * around – 40 hdc
Rnd 6: * 1 hdc in 1st 4 hdc, 2 hdc in next hdc, cont. from * around – 48 hdc
Rnd 7: * 1 hdc in 1st 5 hdc, 2 hdc in next hdc, cont. from * around –
Rnds 8- 14: 1 hdc around, end off. Add more rows to fit baby’s face if needed. (before working earflaps and sc edging) Keep in mind that you will be working 4 more hdc rnds and 1 sc rnd from this point on. 

Earflaps
Fold hat in half so seam is in back Count 7 sts at center of each side and pm at st # 1 and st # 7.
Row 1: Sl st in 1st st at right; hdc in same st and in next 6 sts, turn – 7 hdc
Row 2: Ch 1, hdc in next 7 hdc, turn – 7 hdc
Row 3: Ch 1, hdc2tog in 1st 2 sts (1 dec), hdc in next 3 hdc. Hdc2tog in last 2 hdc, (1 dec) turn – 5 hdc
Row 4: Ch 1, hdc2tog in 1st 2 sts (1 dec), hdc in next hdc. Hdc2tog in last 2 hdc, (1 dec) turn, end off – 3 hdc
Try hat on baby’s head and add or delete rows as needed to fit face. 

Edging
Attach yarn at any st and sc in each hdc around entire edge of hat. 

Braids (optional) Make 3
Cut 8 strands of yarn in 8” lengths. Fold all 8 strands in half, making 16 strands. Braid into desired length, and trim ends. Sew all 3 braids to top of crown from inside of hat, using yarn and yarn needle. Note: I made each braid a different length. Another option would be to sew a braid to bottom edge of earflaps.
Weave in all loose ends. 

Hat fits a life size baby doll too!

Tuesday, September 18, 2012

Darling Daisy Hat / Scarf - Positively Crochet!

Design by Mary Jane Hall

Darling Daisy Scarf/Hat
This runway inspired scarf could be made for a girl or an adult. I saw one similar in a Fall runway collection (to the floor) but it can be made in any length. Most helmet type hats have the flaps on the side, but I put flowers there instead. The runway version is knitted. My scarf  has a chain link, open stitch pattern, and flowers all over, which are placed on the outside
after the scarf /hat is finished.

Lion Brand wool yarn was used but you can use any # 4 medium worsted wt. yarn for this EASY project. Picture your daughter wearing this to school. The colors go with so many outfits and it's a great conversation piece!


This scarf has flowers attached to the ends instead of fringe and could be done in any color combination. The scarf is attached to the cap, and can be wrapped around the neck or hang down.This fun project has been popular with people of all ages!

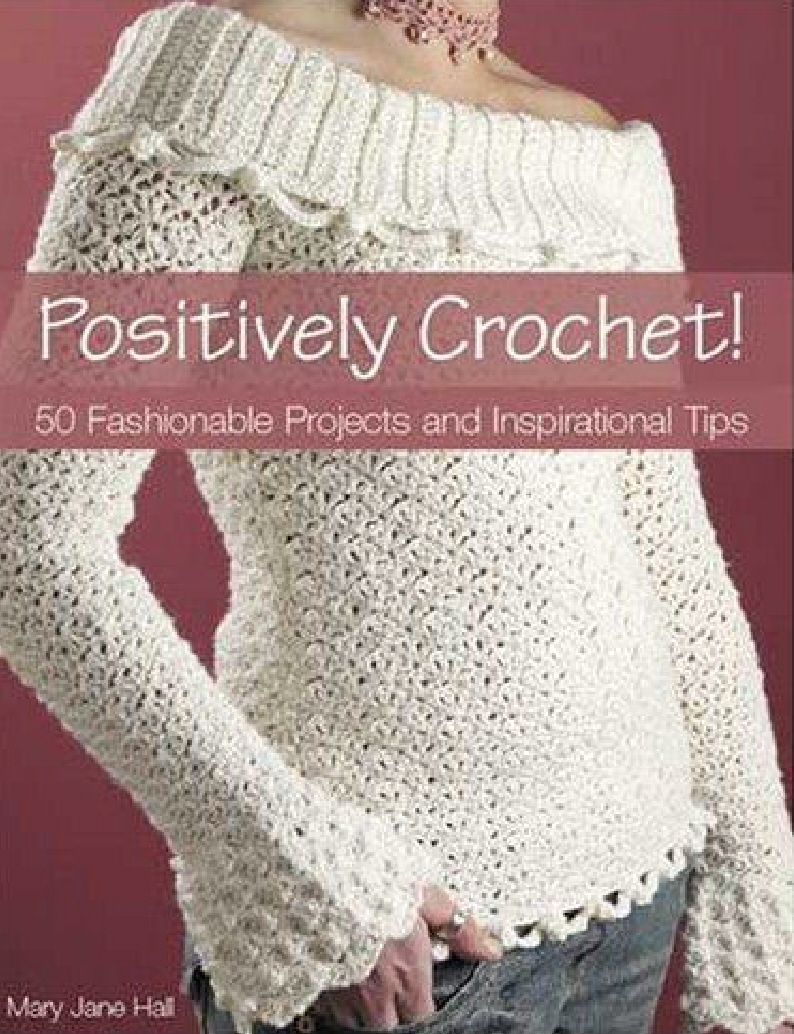
Positively Crochet! (at right) is a book of 50 Trendy Crochet Garments and Accessories. You can buy it for a little over $15.00! That's a fabulous price for that many patterns. This book contains projects for scarves, sweaters, hats, jewelry, shrugs, children's items (including a couple of Mother - Daughter projects) + many more quick and easy gift ideas for anyone. You can read the many 5 * reviews on Amazon. To order this book and read more about it, click on the book cover in my right column. If you are receiving this post in your email, you can click the link below to be directed to Amazon.

Positively Crochet! on Amazon


Thursday, February 24, 2011

Sweet, Sweet Amelie - What a Cutie!

Just look at this sweet little baby face! I had to share the photo of little Amelie in her hat. She's my youngest granddaughter.(16 mos) I rarely have time to make things just for fun, and rarely use someone's else's patterns but I was looking for something quick to do and found this free pattern at the Lion Brand website. I made it a little big for her so she could wear it next winter also. It's called "Speed Hook Earflap Hat and Scarf Set"


  Here's the link to the free pattern at Lion Brand.

Monday, February 21, 2011

Scallop Shells Capelet and Cap - Pattern for Sale

This capelet looks stunning over a black top. You could also add embellishments such as a flower or ribbon. The pattern is easy, and will fit most women (xs-xlg) If you want to make a plus size, all you have to do is add to the beginning chain. I take Paypal.. You can purchase the pattern (both items) for $6.99 with no shipping to be delivered by email. See details below

                       Scallop Shells Capelet and Skull Cap

This is my lovely daughter in law, Anca
Materials
Crochet Hook Size H/8 (5mm)
Yarn-You can use any # 4, medium worsted weight yarn


Scallop Shells Capelet and Hat - Pattern only


Saturday, January 29, 2011

FREE Cochet Pattern

Newsboy Cap Pattern in Fifth Avenue Magazine
Design by Mary Jane Hall 
 

 The pattern for this Newsboy Cap was published in the Sept 05' issue of  Fifth Ave Magazine. It was a great honor for me to have a design in a magazine that is a Fashion magazine and not even a crochet magazine. This is a very easy pattern, especially for those who do not like crocheting in the round. The method I use makes it so simple to count the stitches. You'll be surprised at how easy this is. It's one of my most popular designs on Ravelry and you can go there to see the many projects other crocheters have made form this pattern. I hope the step by step photos help!


I used plastic canvas to stiffen the brim, but you could easily make it without the stiffiner. If you prefer a Beret, just eliminate the brim altogether. See pattern below.

Puff Stitch Newsboy Cap
Design by Mary Jane Hall

 One size fits most
Skill level - Intermediate

MATERIALS
6 oz. worsted wt. yarn - Bernat Super Value in Damison (dark purple)
Crochet hooks size H/8 (5 mm) and F/5 (3.75)
Plastic canvas
Yarn Needle
GAUGE
(If your gauge does not match this, change to a smaller or larger hook. Change to a larger hook if you have more than 4 dc to 1 1/8”, or change to a smaller hook if you have less than 4 dc to 1 1/8”)
With H hook, 4 dc= approx.= 1 1/8" With F hook, 5 sc=1 1/8"
With H hook, 2 dc rows= 1 1/8" With F hook, 6 sc rows= 1 1/8"
With H hook, 1 Puff st= 1/2"
Puff st: With loop on hook, do not yarn over (Insert hook in st, pull yarn up to 1/2", yo, insert hook in same st, pull yarn up to 1/2" for the 2nd time, yo, insert in same st and pull up yarn for the 3rd time, yo and insert in same st again, pull up yarn for 4th time, yo and pull hook and yarn through all 8 loops on hook) In pattern: When you work the 1st dc immediately after puff st, you need to work the dc tightly, so puff st will stand up, but do not work the other dc's this tight.
INSTRUCTIONS: Worked in rounds
With H hook, ch 3, (counts as 1st dc)
Rnd 1: Working all sts into 1st ch, (puff st, dc) 5 times, puff st; join with a sl st to 1st dc. 6 Puff sts (see photo 1 below)

Photo # 1


This is what round 1 will look like with 6 Puff stitches
Rnd 2: Ch 3, (counts as 1st dc here and throughout) puff st in same place as joining, * (dc and puff) in ch 1 of next puff, (dc and puff) in next dc, rep from * around to last puff, (dc & puff) in ch 1 of last puff, join. (12 puff sts)
Rnd 3: Ch 3, dc in same sp as joining, * puff in ch 1 of next puff, 2 dc in next dc, rep from * to last puff, puff in ch 1 of last puff, join. (12 puff with 2 dc between each puff st)
Rnd 4: Ch 3, 2 dc in next dc, puff in ch 1 of next puff, * dc in next dc, 2 dc in next dc, puff in ch 1 of next puff, rep from * around, join. (12 puff with 3 dc between)
Rnd 5: Ch 3, dc in same sp as joining, dc in each of next 2 dc, * puff in ch 1 of puff, 2 dc in next dc, 1 dc in each of next 2 dc, rep from * around, join. (12 puff w/ 4 dc between)
Rnd 6: Repeat rnd 5, working 5 dc between each puff st. (2 dc in 1st dc, 1 dc in each of next 3 dc, etc.)
Rnd 7: Rep rnd 5, working 6 dc between each puff
Rnd 8: Rep rnd 5, with 7 dc between each puff
Rnd 9: Rep rnd 5, with 8 dc between. Cap will still be a flat circle at this point (see photo 2 below)

Photo # 2


  Rows 1-9 will look like this when lying flat (before you start to decrease)

Rnd 10: Decrease row: Work 7 dc between each puff in this manner. Ch 3, (counts as 1st dc) 1 dc in each of next 5 dc, work 2 dc tog. in last 2 dc (this is a dec, making it 1 st) To work 2 dc together (in next to last dc, (between puff sts) work dc, leaving last loop of dc on hook, work dc in next st, and leaving last loop again, you should have 3 loops on hook. Yo and pull yarn through hook- 1 dec made) 7 dc between
Rnd 11: Rep rnd 10, with 6 dc between
Rnd 12: Rep rnd 10, with 5 dc between
Rnd 13: Rep rnd 12, with 5 dc between each puff st. (work even with no decreases) See photo 3 below

Photo # 3


 Cap starting to take shape after decrease rounds. It should look like this before you add the bands.


Another view of Photo # 3

BAND:
Rnd 14: Change to F hook. Ch 1, sc in same st as joining, sc in each sc around. Join to 1st sc. (72 sc)
Rnds 15 - 18: Repeat rnd 14. End off yarn.

BRIM: Continue with F hook (crochet tightly) With top of hat upside down in your lap, and right side (front) facing you, join yarn with sl st in a st directly above a puff st. (see photo 4 below)

Photo # 4

Attaching Brim To Band – Decide where you want center of cap to be, place marker, then count over 7 stitches to the right to begin row. The first row of brim will have 14 stitches.

 These rows will not be turned. End off each row.
Row 1: Ch 1, sc in same sp as joining, sc in next 13 sts. End off yarn. (14 sc)
Row 2: With right side facing, join yarn in 1st st, 1 sc in each of next 3 sts, 2 sc in next st (inc), 1 sc in each of next 6 sts, 2 sc in next st (inc), 1 sc in each of last 3 sts. End off. (16 sc)
Row 3: With right side facing you, join yarn in band 2 sts from beg of brim, 1 sc in each of these 2 sts, 1 sc in each of next 4 sts of brim, 2 sc in next st, 1 sc in each of next 6 sts, 2 sc in next st, 1 sc in each of last 4 sts of brim, 1 sc in each of next 2 sts in band. End off (22 sc)
Rows 4-9: Continue working 2 more sts of band (on each side) and 2 more sts (increases) above inc of previous row. (6 inc on each row: row 4=28 sts, row 5=34 sts, row 6=40 sts, row 7= 46 sts, row 8= 52 sts, row 9= 58 sts) Mark inc to make it easier. End off yarn.
FACING for brim: (optional) Work to correspond to brim in following manner: (rows will be turned)
Row 1: With hat upside down in your lap, and back side of brim facing up, join yarn with sl st to back loop of 1st st (sc) of brim at far right. (see photo 5 below)

Photo # 5

Facing for Brim – Place hook and yarn in back loop of stitch that is to the far right on back side of brim.

Sc in same sp, sc in each remaining back loop only of each sc across brim. (58 sc) Ch 1, turn (do not end off yarn)
Row 2: Place markers to correspond to inc on brim (this is where your deceases will be) Sk 1st 2 sc, working in both loops from here on out, sc in each sc across row, decreasing 1 st above increases on brim, and leaving last 2 sc unworked. Ch 1, turn. 6 dec (52 sc)
Rows 3-9: Repeat row 2, decreasing 6 sts on each row, making facing same size as brim.
Weave in all loose ends of yarn before sewing facing down.
BUTTON (for top)
With F hook, ch 3, join with sl st to form ring. Join next 3 rows with sl st
Rnd 1: Ch 2 (counts as hdc) 7 hdc into ring, join (8 hdc)
Rnd 2: Ch 2, working in back loop only, work 1 hdc into same sp as joining, 2 hdc into each hdc around, join.(16 hdc)
Rnd 3: Ch 2, continuing to work in back loop only, 1 hdc in each hdc around, join (16 hdc) End off yarn, leaving a 12" strand. With yarn needle, thread yarn through last rnd of sts. Pull to tighten. Sew button to top of hat with yarn and yarn needle. (Photo 6 below)

Photo # 6


Sew button to top center of cap

FINISHING:
Cut piece of plastic canvas same size as brim, and place in between brim and facing. With yarn needle and yarn, sew facing to underside of brim, holding plastic canvas in place.
For larger hat: (make changes as follows)
Rnd 10: Inc to 9 dc between
Rnd 11: Dec to 8 dc between
Rnd 12: Dec to 7 dc between
Rnd 13: Dec to 6 dc between Go to rnd 14
Band instructions for larger hat:
Rnd 14: continuing with H hook, ch 1, sc in same sp as joining, sc in each sc around, skipping the ch 1 sp at top of each puff st. (12 dec on row) Sl st to 1st sc. (72 sc)
Rnds 15 -17: Change to F hook from here on out. Ch 1, sc in each sc around.
Note: If hat is too loose on head, on rnd 17, you may want to dec 4-6 sts spaced evenly around row, placing markers before you start. End off yarn.
The hat looks good with a brooch. Another option would be to put a ribbon bow there, since bows are so popular!

 NOTE: Please do not copy or sell this pattern. If you would like to sell your own projects you make from this pattern, you are welcome to do that, as long as you give me the credit as the designer. Thank you for cooperating and enjoy the pattern! Mary Jane 
Abbreviations:
st (s) - stitches
yo-yarn over
inc - increase
sp - space
hdc - half double crochet
dc - double crochet
sl st - slip stitch
dec - decrease
rnd - round
sc - single crochet
rep - repeat
sk - skip
beg – beginning