Welcome to my blog!

Welcome Friends! Please be patient while I add more info. I have SO much to share with you. Thanks for visiting!
Showing posts with label Quick Crochet Patterns. Show all posts

Thursday, October 6, 2022

Knit Look Free Crochet Cowl Pattern

Knit Look Beginner
Free Crochet Cowl Pattern
By
May Jane Hall

Description 

This is a beginner project that's quick and easy. If you'd rather have a long scarf that's not circular like an infinity scarf, just work enough chains at the beginning to the length you want your scarf to be, then work the entire scarf in rows (not rounds) turning each row to get the ridged effect. Don't forget to work all rows in the back loop only. You will be working all half double crochet stitches (hdc) after your beginning chain, and in my opinion working a hdc in the blo is what makes this stitch look like knitting. 

Tip - you can use a smaller hook than size M, but keep in mind if you do use a smaller hook, your scarf will not be as drapeable and will be stiffer. The loser you crochet with a larger hook, the softer your scarf will be.

Finished Size - I made this for a friend and didn't measure it because at the time I didn't know I was going to offer the cowl as a free pattern. 

Materials

Vannas Choice yarn: #4, worsted wt yarn in color: Barley

Note: any worsted (or Aran) wt yarn can be used for this pattern. You can use a smaller yarn and smaller hook, such as #2 sport wt, #3 DK wt, but keep in mind that you'll need to crochet more foundation stitches at the beginning to make it longer if you do this. You could even use a bulky yarn but would need to make less foundation sts. 

Crochet Hook: size M/13 (9mm)

Gauge: I made this as a gift for a friend and did not measure the gauge before I gave it to her. Even though your gauge is very important when making garments, it's not all that important when making a scarf. That is, unless you want it to look identical to the one the pattern was written for. Something to keep in mind is that I always use a larger hook than what the company suggests on the yarn label. You do not want your crochet items to be hard and stiff unless it's a purse or a molded hat. 

Stitches used: Chain (ch), slip stitch (sl st), half double crochet (hdc)

Abbreviations: 

Blo - back loop only

Ch - chain

Hdc - half double crochet

Rep - repeat

Rnd - round

Sl st - slip stitch

St - stitch

Pattern notes: all rounds are worked in the blo (back loop only) to get the ridged effect. You will be slip stitching the last st to the first st on each end. (Unless you make 1 long scarf that's not in the round). Then you'll turn each round. If you don't turn the rnds, you won't get the ridged effect. Ch 2 at the beginning of each round.
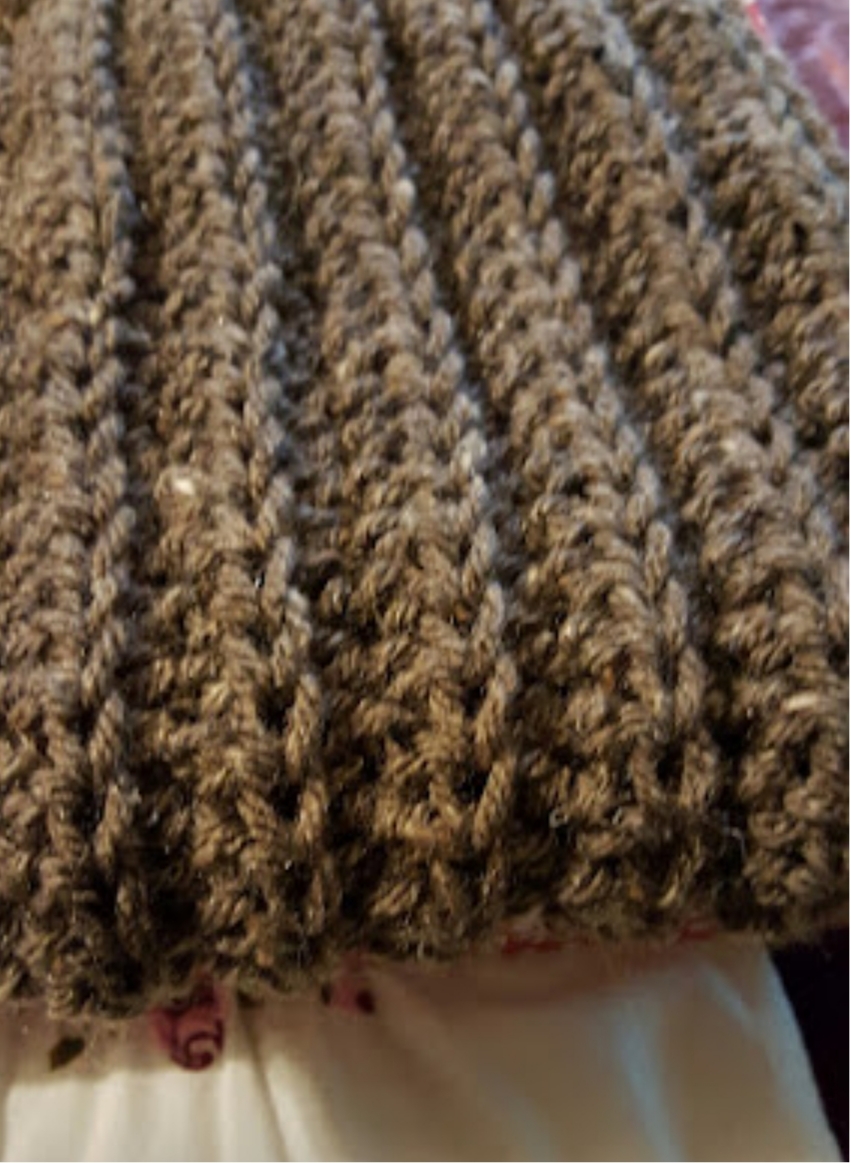
Knit Look Crochet Cowl 
Free Beginner Pattern by
Mary Jane Hal

Instructions

Foundation row: Ch 144 , being careful not to twist ch, sl st to 1st ch (circle made)

Rnd 1: ch 2, work hdc in blo of each ch, sl st to first st, turn- 144 hdc

Note: in order to make the raised ridges, you have to turn each round/row, and work in the back loop only (blo) of each stitch (hdc), otherwise your stitches will all be flat.

Rnds 2 - ___: Rep rnd 1 until you get the desired width of the cowl. (Sorry I did not count these rows either, before I gave this cowl to my friend!)

End off yarn and weave in all loose ends. 

PLEASE LET ME KNOW IF YOU HAVE QUESTIONS!

Important: Remember, if you want your friends to know about this pattern or post about it, you'll need to post a link on your blog to have them come to this blog. You're not allowed to copy the text and put the pattern on your blog. Because if you post my pattern on your blog it's considered stealing. Please follow the copyright laws. One of the reasons to offer free patterns is so I can promote my crochet books that are sold on Amazon. I still receive royalties from the sale of my books and this is part of the way I make my living. So posting my patterns on your blog or anywhere else takes away from my income.  


Saturday, April 27, 2019

Emoji Coffee Sleeve II - Free Crochet Pattern

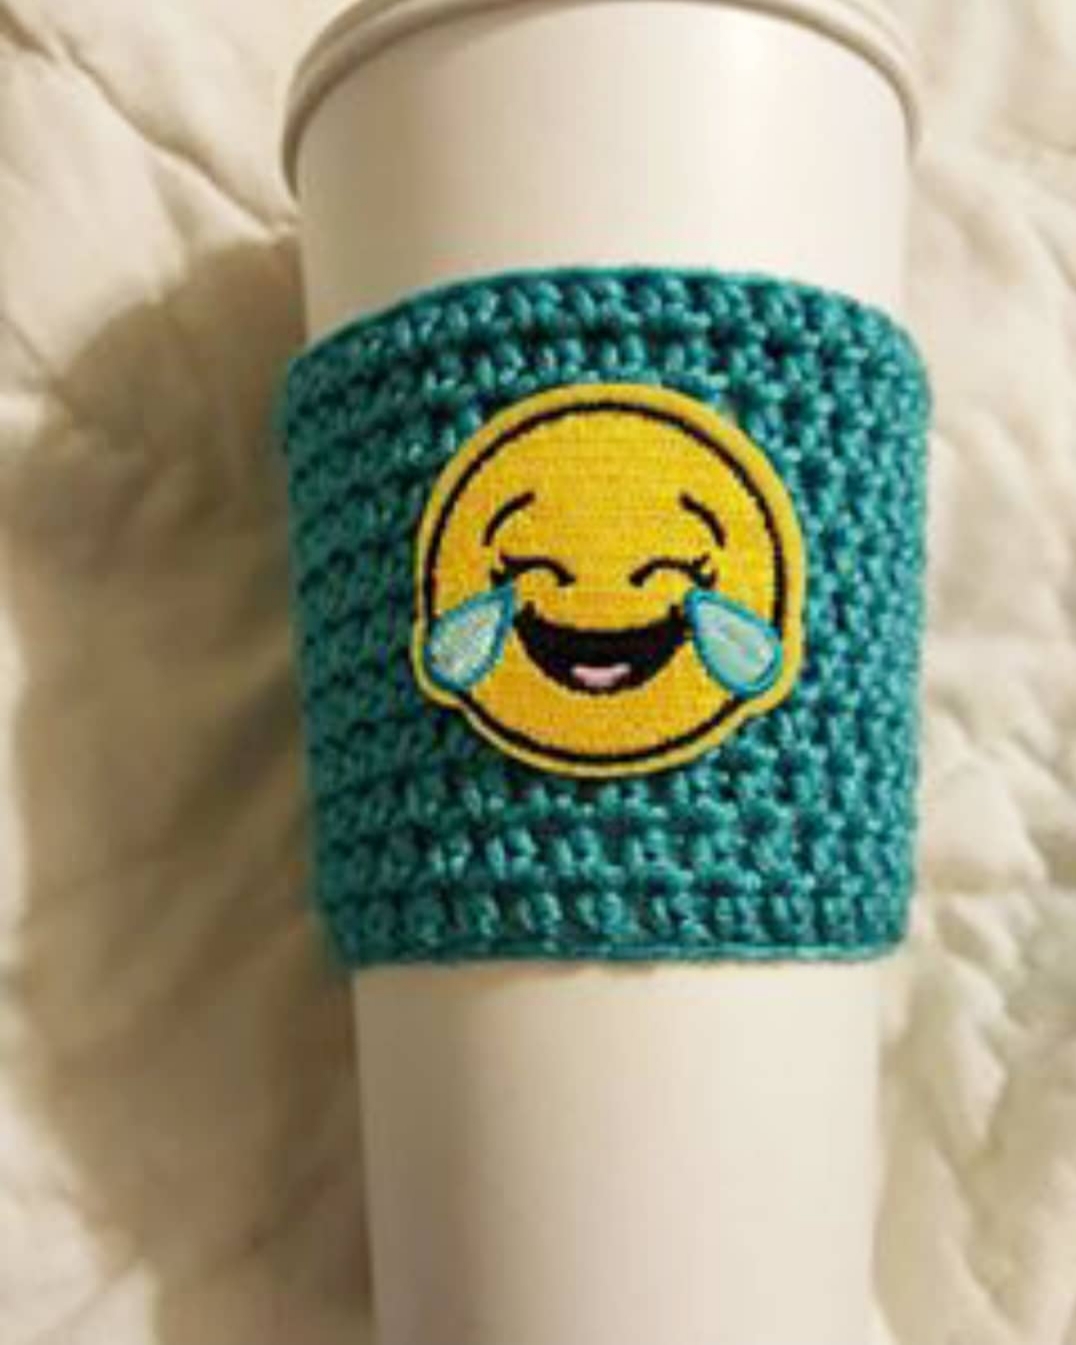
This Emoji Coffee Sleeve pattern is made different than the first one. The Smily faced one uses hdc stitches and has a Picot border, but this one is all sc rows, making it easier than the first one. It does not have the picot border. 


Coffee Sleeve with Laughing Emoji Patch - Free Crochet Pattern by Mary Jane Hall

I have at least 22 patterns for Coffee Sleeves and Coffee Cozies that I want to share with you. They will be free and all I ask is that you do not sell my patterns. If you share them please make sure you give me credit as the designer.  It's perfectly fine if you want to make any of my patterns and sell the item.
The written patterns are not very long and these should be a perfect project for a beginner.  I let other things get in the way of posting these patterns but I promise I will try to add one every few days.
Coffee Sleeves can also be considered a Coffee Cozy as far as the name, but the Sleeve is more like something you put on a paper cup such as one from Starbucks or McDonalds. You slip it on at the bottom of the paper cup.
But if you want a cozy for a mug, that's a little different. You can't put a Coffee Sleeve on a mug that has a handle. So I have different patterns for what I call a "Mug Cozy".
This pattern is a Coffee Sleeve that slips on the bottom of a paper coffee cup.

Light Teal Coffee Sleeve with Emoji Patch

Materials
Hook Size
US- G/6
UK - 8
Metric - 4.00mm

Yarn
Red Heart Soft Yarn
Color - teal or any other #4 worsted weight yarn. If using a thicker yarn you will have less stitches in each round. If using thinner yarn you will have more stitches in each round.
Emoji Patch or Applique (can be bought at Hobby Lobby or ordered from eBay, etsy or Amazon)
Starbucks paper cup

Note: if sleeve is too loose after the first round or 2, you may have to chain less at the beginning (28 instead of 30) or you can use a smaller hook. 

Instructions
All rows are sc (single crochet)
You will need to slip the Sleeve onto the cup after the second row to see how it fits. You may crochet tighter or loser than I do so that's why you need to try it on. This is easy enough for a beginner and it's not difficult to tighten up your stitches or use a smaller hook if the cozy is too loose on the cup. It's better to make it a little tight, because it will probably stretch from use.

Chain 28
Round 1: Sc in 2nd chain from hook and in each chain to the end - 27 sc
Being careful not to twist chain, slip stitch into first stitch forming a ring. Do not turn. You will continue working in the round.
Note: put the sleeve on the cup to make sure it's not too loose. Do this after every coupler of rows.
Rounds 2-11: sc in first sc of round and in each sc around, slip stitch to first sc - 27 sc
Note: by the end of the 2nd or 3rd round you should be able to keep working without joining with a slip stitch.
After last round, end off, making sure the yarn is long enough to weave in.

Friday, April 26, 2019

Emoji Coffee Sleeve 1 - Free Crochet Pattern

This is a cute, quick little crochet project for a beginner! It would be a nice gift. You can find patches (or appliques) at craft stores or places like eBay, etsy and Amazon. The possibilities are endless!


Smily Face Emoji Coffee Sleeve with Picor Edging- free pattern by Mary Jane Hall

Materials
Hook Size (for pink hdc rnds)
US- H/8
UK - 6
Metric - 5.00
Hook Size (for black picot edging)
Us - B/1
UK - 13
Metric - 2.25

Yarn
(A) Impecable Loops and Threads Yarn by Michael's
Color - Rich Orchid, color # 01404, or any other #4 worsted weight yarn. If using a thicker yarn you will have less stitches in each round. If using thinner yarn you will have more stitches in each round.
(B) Black Picot Trim - #3 crochet cotton thread by Aunt Lydias

Smiley Face patch (or applique). Link to several patches on eBay. You can also find patches at craft stores like Hobby Lobby.
Starbucks paper coffee cup

Picot- ch 2,  sl st in first chain

Note: if sleeve is too loose after the first round or 2, you may have to chain less at the beginning (28 instead of 30) or you can use a smaller hook. 

Instructions
Chain 30, being careful not to twist chain, join with slip stitch to first chain. Do not turn work. 
Rnd 1: hdc in same sp as join, and in each chain around, slip stitch to first hdc. 
Rnd 2: hdc in same space as join and in each hdc around,  join to first hdc with sl st. Put piece onto paper coffee cup to see if it will be too tight or too lose. If not, continue. It's better to be a little tight than loose, because it will stretch with use.
Rnds 2-9: continue working hdc rounds, putting sleeve on cup after every few rows, making sure it's not too loose. By the 2nd or 3rd rnd  you can continue to work rows without joining the end of each rnd. Just work right over top of the last join. Doing it this way with make it looks much better because it will be seamless. 
After rnd 9, end off yarn. 

Picot Edging
Attach black thread to any hdc with slip knot. Chain 1, sc in first hdc, work Picot, (see above); continue working (sc, Picot) in each remaining hdc, join with sl st to first sc, end off yarn and repeat this on other edge. 
Weave in ends. 

Thursday, April 4, 2019

Fringed Leg Warmers - Free Crochet Pattern

I just can't believe I have not posted the pattern for these Fringed Leg Warmers before now. I designed them years ago and they were published in Crochet! Magazine in 2006. But they are very stylish today, since you see fringe everywhere!

©Fringed Leg Warmers by
Mary Jane Hall

The publisher put the pattern on the web, free to the public, but it disappeared, so I am going to post it here. The pattern is a beginner level. 

The free pattern is below.


Copyright - you have permission to make the leg warmers and even sell your products, but do not had permission to copy and share this pattern as your own. Most people are honest and respect the copyright laws, but I have to say this because there have been a few people who have copied my patterns and sold them as their own. Some have even taken pictures of the patterns in my books ands posted them for free on their blog or website. That is illegal and my publisher has dealt with them.
If you do make projects and sell them on etsy, or at a craft show, it would really be nice if you mention me as the designer. Enjoy the pattern!

Thursday, February 28, 2019

Coffee Sleeve with Fur Trim - Free Crochet Beginner Pattern

I have at least 22 patterns for Coffee Sleeves and Coffee Cozies that I want to share with you. They will be free and all I ask is that you do not sell my patterns. If you share them please make sure you give me credit as the designer.  It's perfectly fine if you want to make any of my patterns and sell the item.
The written patterns are not very long and these should be a perfect project for a beginner.  I let other things get in the way of posting these patterns but I promise I will try to add one every few days.

Coffee Sleeve with Fun Fur Trim - free crochet beginner pattern
by Mary Jane Hall

Coffee Sleeves can also be considered a Coffee Cozy as far as the name, but the Sleeve is more like something you put on a paper cup such as one from Starbucks or McDonalds. You slip it on at the bottom of the paper cup.
But if you want a cozy for a mug, that's a little different. You can't put a Coffee Sleeve on a mug that has a handle. So I have different patterns for what I call a "Mug Cozy".
This first pattern is a Coffee Sleeve that slips on the bottom of a paper coffee cup.

Purple Coffee Sleeve with Fur Trim

Materials
Hook Size
US- G/6
UK - 8
Metric - 4.00mm

Yarn
(A) Red Heart Soft Yarn
Color -purple, or any other #4 worsted weight yarn. If using a thicker yarn you will have less stitches in each round. If using thinner yarn you will have more stitches in each round.
(B) Fun Fur or Eyelash yarn - purple

Starbucks paper cup

Instructions
All rows are sc (single crochet)
You will need to slip the Sleeve onto the cup after the second row to see how it fits. You may crochet tighter or loser than I do so that's why you need to try it on. Sorry I didn't write down a gauge with this pattern before I sold it at the craft fair! But this is easy enough for a beginner and it's not difficult to tighten up your stitches or use a smaller hook if the cozy is too loose on the cup. It's better to make it a little tight, because it will probably stretch from use.

Chain 28
Round 1: with yarn (A), Sc in 2nd chain from hook and in each chain to the end - 27 sc
Being careful not to twist chain, slip stitch into first stitch forming a ring. Do not turn. You will continue working in the round.
Rounds 2-11: sc in first sc of round and in each sc around, slip stitch to first sc - 27 sc
Note: by the end of the 2nd or 3rd round you should be able to keep working without the slip stitch.
After last round, end off, making sure the yarn is long enough to weave in.

Trim (B)
Make a slip knot and attach fun fur to any sc at top edge of sleeve. Sc in same space and in each sc around. Slip stitch to first sc, end off and weave in ends.

Tuesday, August 29, 2017

Wine Crochet Shrug - FREE Pattern by Mary Jane Hall

This easy crochet shrug is so cozy with the soft yarn that is used. It was originally published in a book called Top It Off! which is a book of designs by several different designers. I was fortunate enough to get my 2 designs on the front cover! That's always an honor. This pattern is now being offered as a FREE pattern HERE. I am really sorry the pattern for this shrug is no longer posted at that link. I will try to add my own personal pattern of this shrug here when I have the time. Please contact me if you want the pattern.

Wine Shrug by Mary Jsne Hall - Free Crochet Pattern

The pattern is basicslly a rectangle, so it's pretty quick and easy. This shrug would be a nice addition to your wardrobe for those cool nights and days. 
See the ways below this shrug can be worn. It can be turned into a scarf and a wrap too!